FREE UK DELIVERY ON ORDERS OVER £25

  • Home
  • Shop
  • Servicing
    • Service T&C's
    • Servicing HW100
    • Servicing HW110 / HW44
    • Servicing FAQ
  • TITANIUM CYLINDERS
  • GUIDES
    • GUIDES HW100
    • GUIDES HW110
    • Tips & Advice
  • HW100 AT
    • AT Removal Guide - UK
    • AT Removal Deutsche
  • Contact Us
  • Gallery
  • Reviews
  • More
    • Home
    • Shop
    • Servicing
      • Service T&C's
      • Servicing HW100
      • Servicing HW110 / HW44
      • Servicing FAQ
    • TITANIUM CYLINDERS
    • GUIDES
      • GUIDES HW100
      • GUIDES HW110
      • Tips & Advice
    • HW100 AT
      • AT Removal Guide - UK
      • AT Removal Deutsche
    • Contact Us
    • Gallery
    • Reviews
  • Sign In
  • Create Account

  • Orders
  • My Account
  • Signed in as:

  • filler@godaddy.com


  • Orders
  • My Account
  • Sign out

Signed in as:

filler@godaddy.com

  • Home
  • Shop
  • Servicing
    • Service T&C's
    • Servicing HW100
    • Servicing HW110 / HW44
    • Servicing FAQ
  • TITANIUM CYLINDERS
  • GUIDES
    • GUIDES HW100
    • GUIDES HW110
    • Tips & Advice
  • HW100 AT
    • AT Removal Guide - UK
    • AT Removal Deutsche
  • Contact Us
  • Gallery
  • Reviews

Account


  • Orders
  • My Account
  • Sign out


  • Sign In
  • Orders
  • My Account
HW100TUNING

Regulator Pressure Test Port Upgrade

This guide assumes the reader has working knowledge of the HW100 e.g. how to remove the stock from the action etc.. 

To use this guide, the original Grub Screw, Ball Bearing and O-Ring should  be removed from the Regulator Pressure Gauge Test Port. Sometimes the ball bearing will drop out of the hole BUT that does not happen very  often. If the ball bearing does not drop out, then you will need to  dismantle the regulator and pop it out with a small Allen key - the  HW100Tuning Pressure Gauge Test Port Upgrade was designed by us to negate ever having to do this again.  If you need any help getting the ball bearing out,  try this guide:  HW100 Regulator Tweaks 

BUY THE REG PRESSURE TEST PORT SEAL UPGRADE
The original sealing system of the regulator pressure test port on the Weihrauch HW100

Step 1:   remove the original ball bearing, grub screw and o-ring and rebuild the regulator section of the HW100 

Upgraded regulator pressure test port seal for the Weihrauch HW100 made by HW100Tuning

Step 2:  from our kit, place  the o-ring onto the brass plunger, add a thin smear of the supplied MolyKote 111 to the o-ring. 

How to fit the upgraded regulator pressure test port seal to the Weihrauch HW100

Step 3:  screw the oring & plunger into the Pressure Gauge Test Port and  tighten it with a 3mm Allen key (Hex Head). 

Removing the oring seal using a cocktail stick from the regulator pressure test port of a HW100

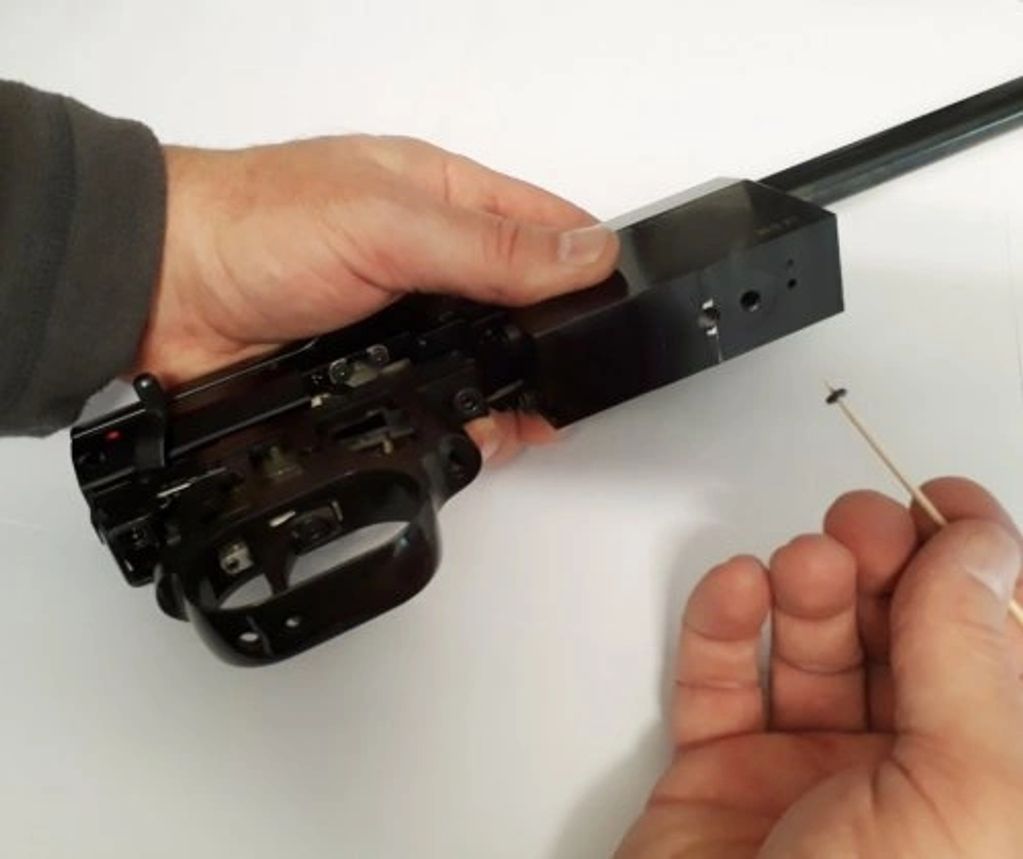
Removal:  To remove, make sure the pressurised  air cylinder is NOT fitted and  simply insert a 3mm Allen key head into  the plunger and unscrew.  Sometimes the  o-ring may stay in the Pressure  Gauge Test Port/Hole when you unscrew the  plunger, this is normal,  just use a cocktail stick (or similar) to coax  the o-ring out. 

When re-fitting, NEVER leave the o-ring  in and then replace the  plunger, this may damage the o-ring. Always  follow steps 2 & 3 above.

BUY THE REG PRESSURE TEST PORT SEAL UPGRADE

Copyright © HW100TUNING - All Rights Reserved.

  • Privacy Policy
  • SHIPPING
  • Ti Cylinder & Reg
  • Pre-Chamber Insert
  • LINKS

This website uses cookies.

We use cookies to analyze website traffic and optimize your website experience. By accepting our use of cookies, your data will be aggregated with all other user data. Privacy Policy

Accept